You will need:
–A picture frame: Try searching your local thrift store. The frames are cheap and usually old and more ornate. And trust me, the uglier, the better. All surfaces work: wood, plastic, metal, you name it. Only condition: the frame must have a piece of glass that would normally protect the photograph.
–Scrapbooking supplies (paper, embellishments, glue, glue gun, scissors, ya know)
–A clip of some kind: I found a bag of tiny clothespins at Walmart and they work perfect
So let’s do it!
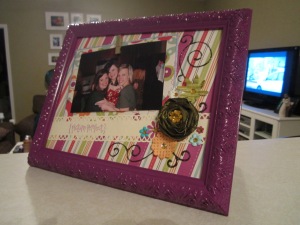
Remove the backing and glass from your frame and set aside. Paint your frame, and get into those nooks and crannies if you got an ornate frame. When you have a well coated frame, use a sealer like Patricia Nimocks in gloss for a protective finish. Allow it to dry completely! Take the scrapbook paper that’s going to serve as your background and cover the front surface of the glass from your frame. Use a glue like Tacky Glue to apply that paper. It should cover the glass completely without lots of excess. If you do have overhang, just trim it up so that it fits nicely back in the frame. Put the glass back in the frame, paper exposed, and secure with the frame backing. This will allow you to visualize the surface for what it really is and you can figure out exactly where your embellishments fit best. Add your embellishments and make this frame work! Add your picture clip and secure with hot glue. This allows you to change the photo out from time to time it’s way more versatile than a regular frame. How simple was that?!
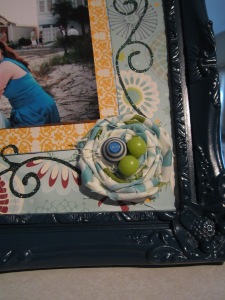
I used self-adhesive rhinestones/pearls for the center of my flowers (I scored those in the dollar section of Michael’s). In one frame you may notice I used buttons; they were vintage from my Grandma Hilda. I used pre-made paper flowers if they coordinated with the color scheme of the frame. Other times I used my Cricut and Martha Stewart craft punches to create multidimensional flowers from paper I had on hand.
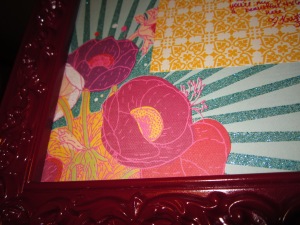
I used scrap fabric from other projects to make rosettes and add texture. I love this no-sew tutorial on how to make a fabric flower the best. I used glitter glue to make the swirly vine patterns (these come in tons of colors and can be found for a buck in tiny bottles at Walmart and Michael’s). If you haven’t done anything with glitter glue before, I suggest practicing a few times on another piece of paper. The key is consistently increasing the pressure on the bottle to make sure the glue comes out at the same rate, and to keep going until you’re finished with each stroke. If you get an air bubble that disrupts the flow, continue anyway. It won’t be perfect, so just slap a paper flower over the gap or the janky parts in the swirl and call it a day, friend.
I stamp on all my frames, and sometimes use ink pads to drag the perimeter of the paper for added interest and dimension. You can also see that technique here. Sometimes, the background paper is the star. So I’ve attempted to show a little restraint and not busy it up unless it was necessary.
Plan the frame out just like you would a scrapbook page, or fly by the seat of your pants. Up to you, just have fun!


